
A Guide to Singapore’s 10 Best Attractions
Thinking about a trip to Singapore? This small island nation may be compact, but it’s packed with incredible sights and unforgettable activities. While it’s part of Southeast Asia, Singapore offers a unique experience, standing apart from neighbors like Thailand and Indonesia with its gleaming modernity and rapid economic growth.
A visit here is a journey through a vibrant mosaic of cultures. If you’re new to Southeast Asia, Singapore is the perfect starting point. The transportation system is incredibly efficient, and since English is widely spoken, navigating the city is a breeze. Ready to explore? Let’s dive into the 10 best places to visit on your Singapore adventure.
1. Merlion Park

What’s the first image that comes to mind when you think of Singapore? For most, it’s the Merlion, a mythical beast with the head of a lion and the body of a fish. This iconic statue stands proudly in Merlion Park, right on the waterfront of Marina Bay. As the official symbol of the country, it draws visitors from all over the world who come to capture the perfect photo. You can’t help but be impressed by its scale—standing 8.6 meters tall and weighing 70 tonnes. Get creative with your poses and snap a classic picture with the fountain spouting from its mouth.
Merlion Park is more than just a photo op; it’s a central hub. From here, you can easily stroll to other landmarks like the historic Fullerton Hotel. The surrounding area is bustling with local shops and fantastic restaurants, making it a great spot to wander and soak in the city’s atmosphere. A trip to Singapore simply isn’t complete without visiting this iconic landmark.
-
Address: 1 Fullerton Rd, Singapore 049213
-
Hours: Open 24 hours
2. Orchard Road

Get ready for a world-class shopping experience on Orchard Road, Singapore’s premier destination for retail and dining. This bustling boulevard is lined with spectacular shopping malls and luxury hotels, creating a vibrant, high-energy atmosphere. It’s hard to believe this modern paradise was once an area of fruit orchards. The transformation began in 1958 with the opening of TANGS, Singapore’s oldest department store, which paved the way for the district’s glamorous future.
Stretching for 2.2 kilometers, Orchard Road is home to over 20 major shopping centers and 5,000+ stores, from high-end fashion boutiques to international brands. You’ll also find world-class restaurants and entertainment options like cinemas. Don’t miss architectural marvels like ION Orchard and Plaza Singapura. It’s a true shopper’s paradise and a fantastic place to explore.
-
Address: Orchard Road
-
Website: Orchard Road Official
3. Gardens by the Bay
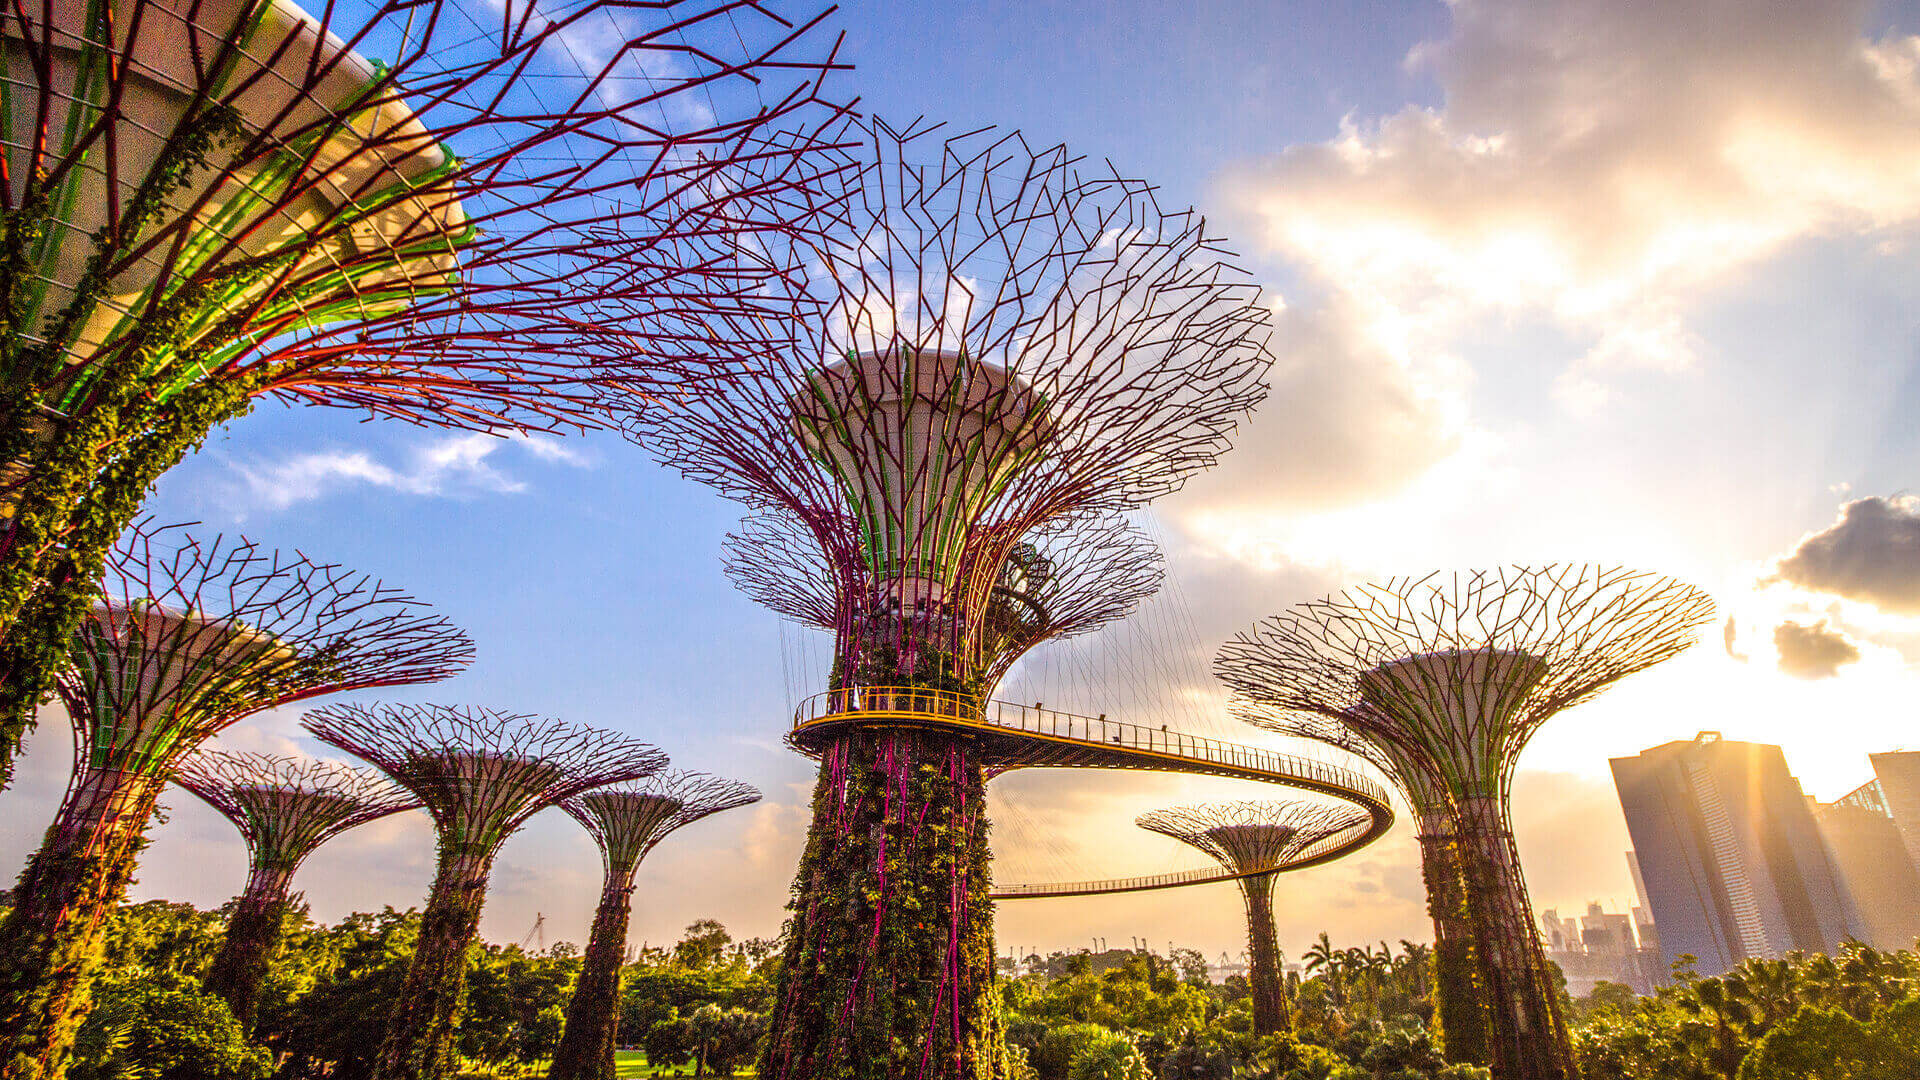
Step into a futuristic wonderland at Gardens by the Bay, a breathtaking blend of nature and technology that showcases Singapore’s vision for a greener future. Opened in 2012, this massive national garden has been instrumental in transforming Singapore from a “Garden City” into a “City in a Garden.” The park is split into three main sections: Bay South, Bay East, and Bay Central.
Bay South is the largest and most famous area, featuring the awe-inspiring Supertree Grove and the massive, climate-controlled conservatories—the Flower Dome and the Cloud Forest. If you’re traveling with kids, the Children’s Garden offers a fantastic natural playground. The gardens also host a variety of special events, from concerts to exhibitions, making every visit unique.
-
Address: 18 Marina Gardens Dr, Singapore 018953
-
Hours: 5:00 AM – 2:00 AM (Outdoor Gardens)
-
Website: Gardens by the Bay
4. Singapore Zoo
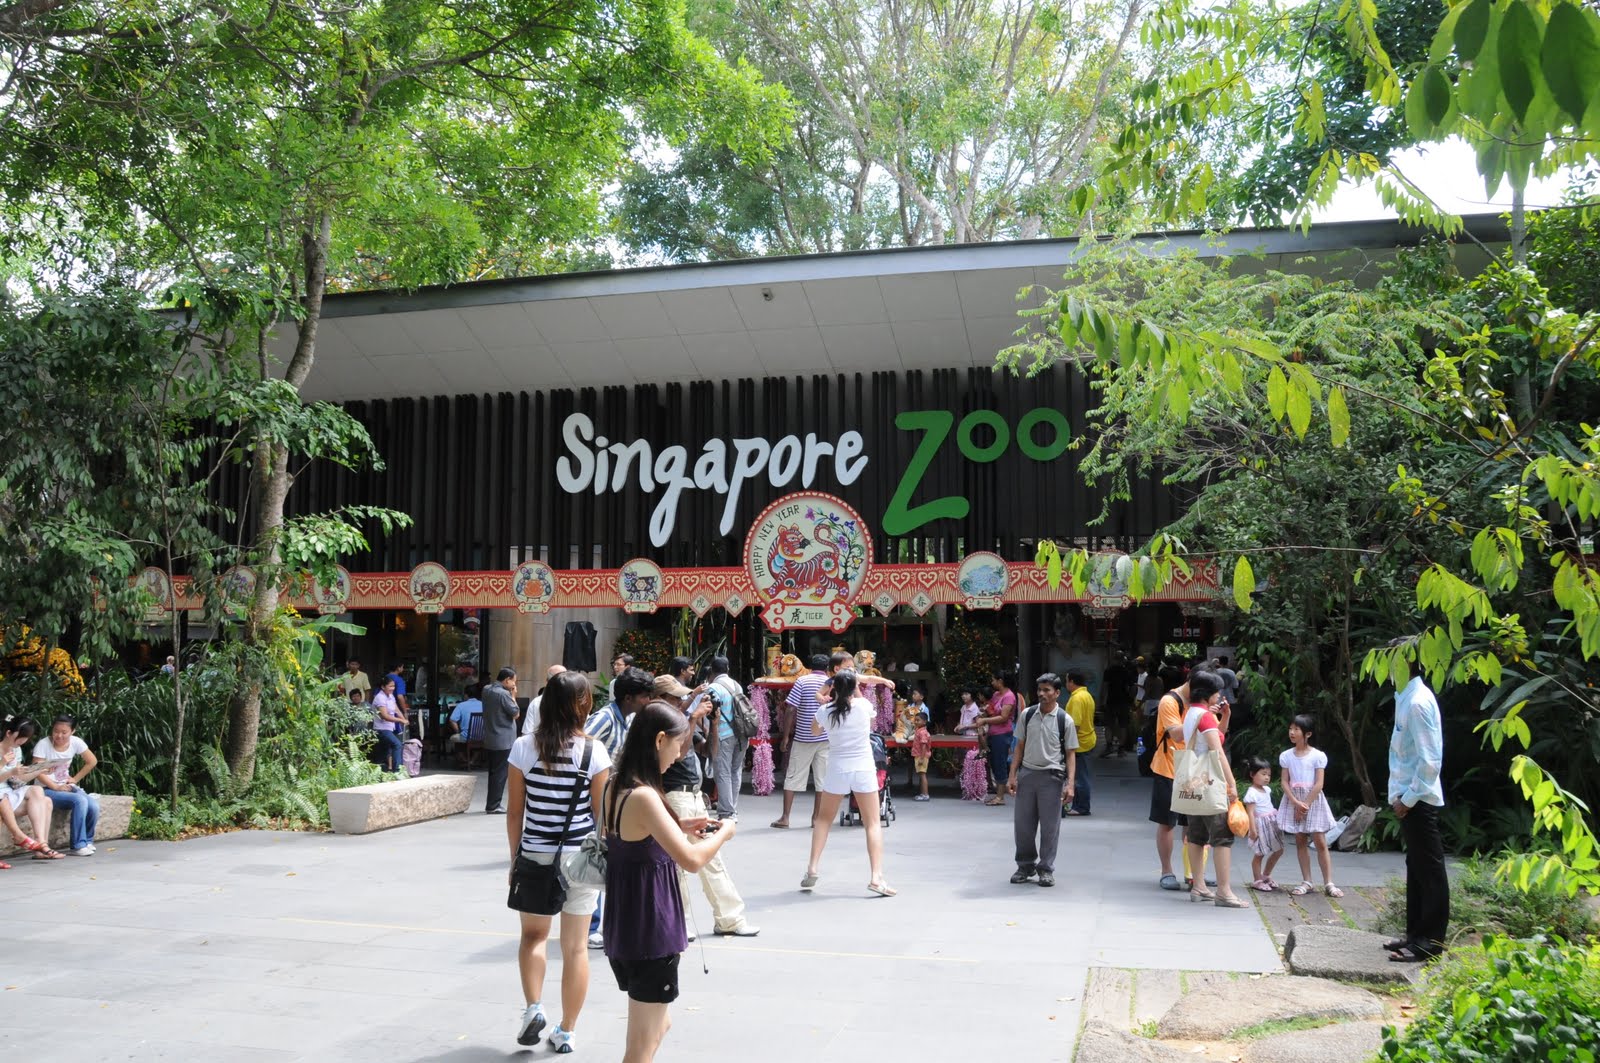
Widely acclaimed as the world’s best rainforest zoo, the Singapore Zoo is a must-visit, especially for families and animal lovers. The zoo’s “open concept” design means animals live in spacious, naturalistic habitats separated from visitors by moats and streams instead of cages. It’s home to around 3,000 animals from over 300 species, including endangered creatures like white tigers and wallabies.
For a truly unique experience, book the Jungle Breakfast with Wildlife, where you can enjoy a meal in the company of free-roaming orangutans. It’s an unforgettable encounter! Adjacent to the zoo are the Night Safari and River Wonders, offering even more opportunities to explore the animal kingdom. With so much to see, you could easily spend a full day here.
-
Address: 80 Mandai Lake Rd, Singapore 729826
-
Hours: 8:30 AM – 6:00 PM
-
Website: The Singapore Zoo
5. Marina Bay Sands
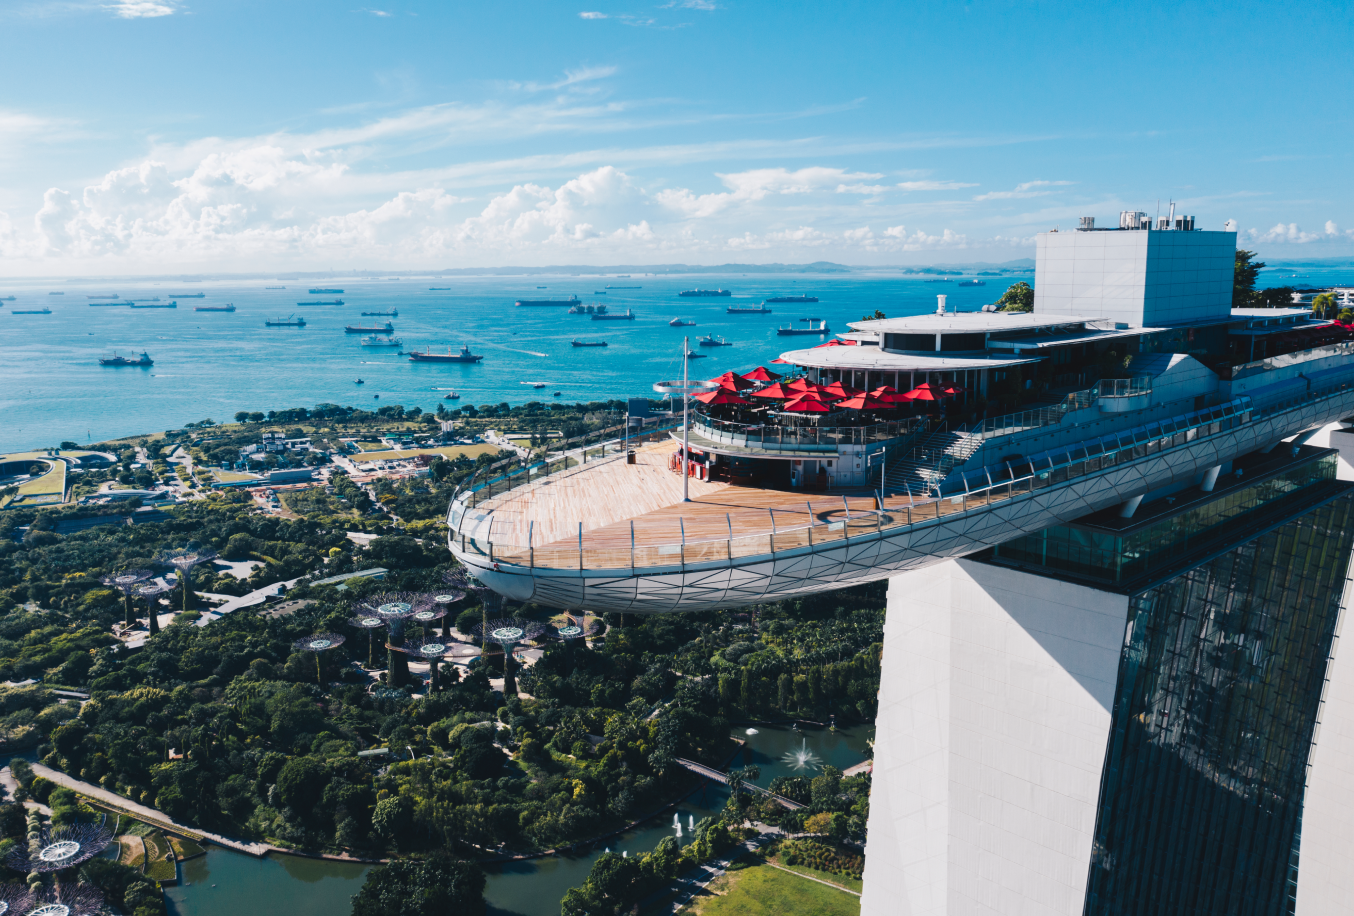
An icon of modern Singapore, Marina Bay Sands is more than just a luxury hotel—it’s a destination in itself. This architectural marvel consists of three soaring towers connected by a massive rooftop SkyPark that resembles a ship. The sheer scale and futuristic design are breathtaking. Inside the complex, you’ll find a world of entertainment, including a high-end shopping mall, the ArtScience Museum, and a casino.
While the hotel offers luxurious accommodation, it’s also a hotspot for visitors. The main attraction is the Sands SkyPark Observation Deck, which offers unparalleled 360-degree views of the city skyline and Gardens by the Bay. While the famous rooftop Infinity Pool is reserved for hotel guests, the observation deck is open to all and provides one of the best views in Singapore.
-
Address: 10 Bayfront Ave, Singapore 018956
-
Hours: Sands SkyPark Observation Deck: 11:00 AM – 9:00 PM
-
Website: Marina Bay Sands
6. Universal Studios Singapore
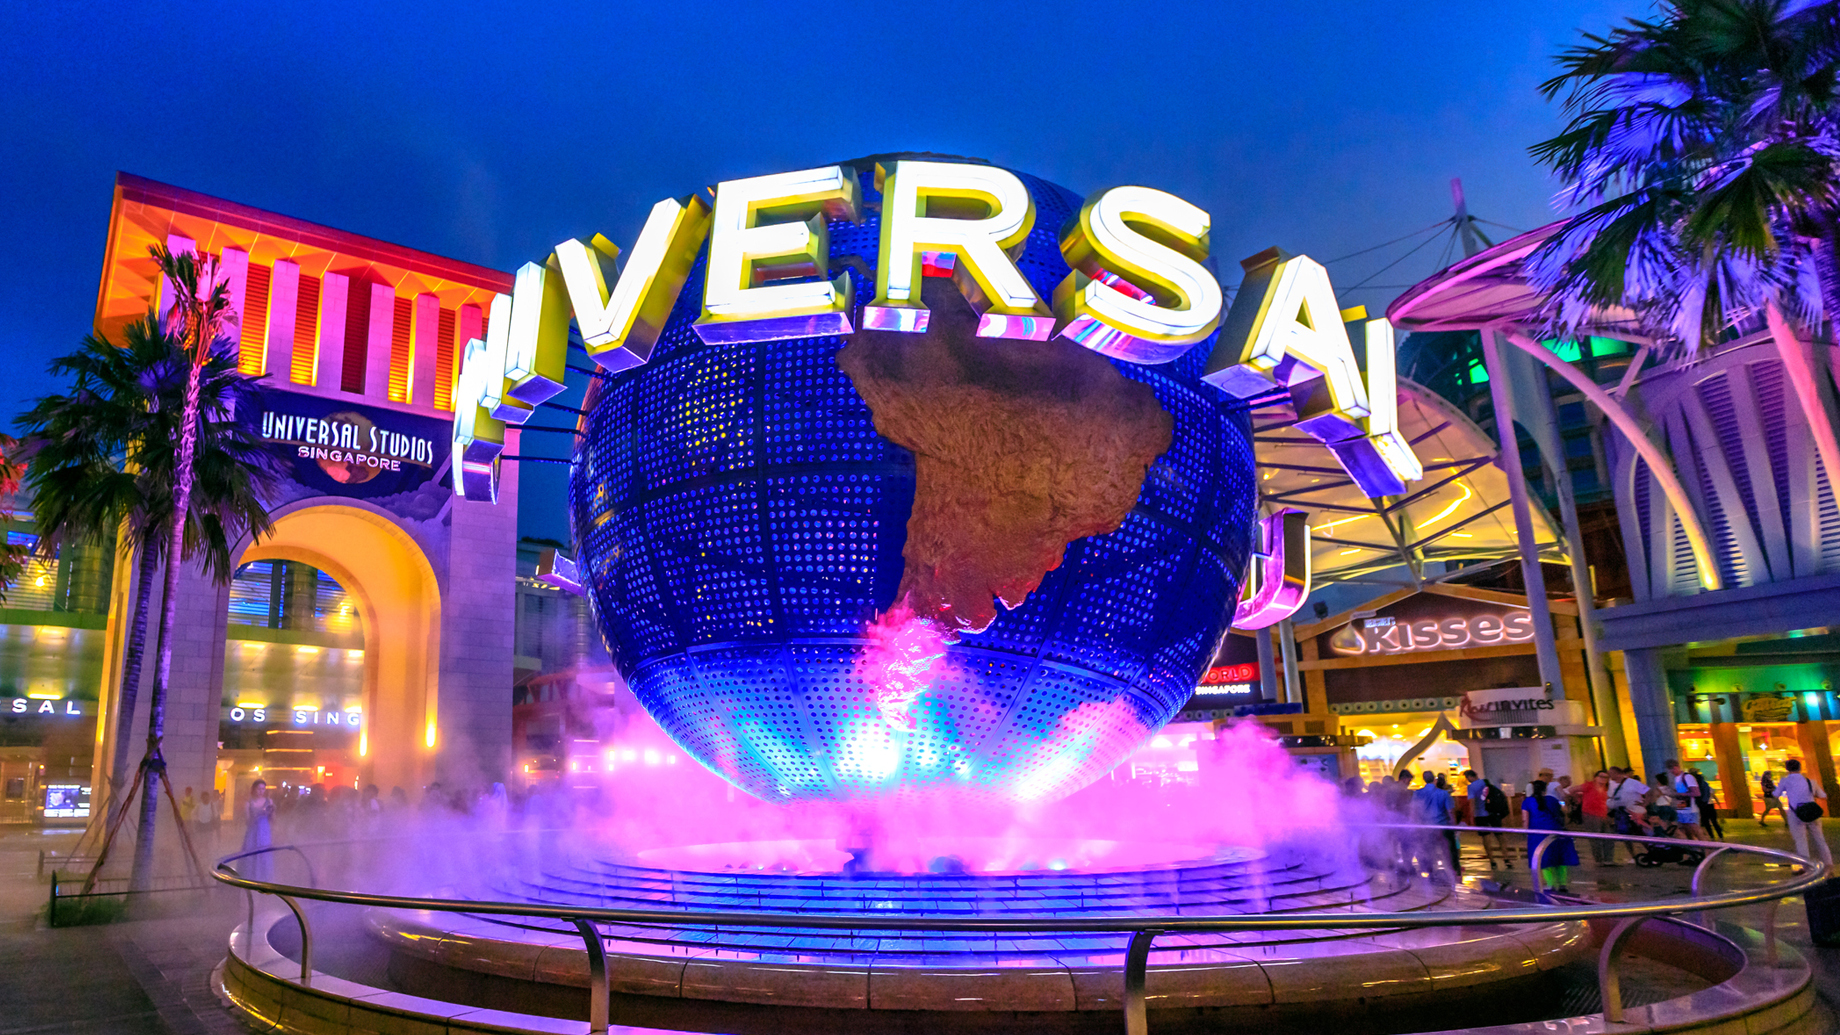
For a day of adrenaline and fun, head to Universal Studios Singapore. As the first and only Universal Studios theme park in Southeast Asia, it’s a premier attraction located on Sentosa Island. The park features 28 rides, shows, and attractions across seven themed zones.
Team up with the Autobots on TRANSFORMERS: The Ride 3D in the Sci-Fi City zone, or face the darkness on the indoor roller coaster, Revenge of the Mummy, in Ancient Egypt. You can also meet beloved characters from films like Shrek and Madagascar. It’s the perfect place to create lasting memories with friends and family.
-
Address: 8 Sentosa Gateway, Singapore 098269
-
Hours: 10:00 AM – 7:00 PM (Hours may vary)
-
Website: Universal Studios Singapore
7. Clarke Quay

After a long day of exploring, unwind at Clarke Quay, a historic riverside quay that has transformed into one of Singapore’s liveliest dining and nightlife hubs. During the colonial era, this was a bustling commercial center. Today, the beautifully restored shophouses are home to a vibrant mix of restaurants, bars, and nightclubs that come alive after dark.
Located right on the Singapore River, it’s a scenic spot to enjoy dinner with a view or simply watch the city lights dance on the water. For the thrill-seekers, the Slingshot and GX-5 Extreme Swing rides nearby offer a serious dose of adrenaline.
-
Address: 3 River Valley Rd, Singapore 179024
-
Hours: 10:00 AM – 10:00 PM (Retail), restaurants and bars open later.
-
Website: Clarke Quay
8. Chinatown
A visit to Singapore’s Chinatown offers a captivating dive into the city’s rich multicultural heritage. Beyond the incredible array of authentic street food, this historic district is a cultural treasure trove. Wander through its bustling streets and you’ll find a fascinating mix of old and new.
Key landmarks include the ornate Sri Mariamman Temple, Singapore’s oldest Hindu temple, and the magnificent Buddha Tooth Relic Temple. The contrast of sacred sites from different faiths standing near each other is a testament to Singapore’s diversity. Don’t forget to explore the Chinatown Street Market for delicious local treats and unique souvenirs. The area is quite large, so consider joining a guided tour to uncover all its hidden gems.
-
Address: Trengganu St, Singapore 050005
-
Hours: 9:30 AM – 8:00 PM (Street Market)
9. Sentosa Island
Welcome to Singapore’s playground! Sentosa Island, located off the southern coast, is an all-in-one destination dedicated to fun and relaxation. Getting there is part of the adventure—you can take the Sentosa Express monorail, a public bus, or soar over the water on the scenic Singapore Cable Car.
Once on the island, the options are endless. You can relax on one of the three beautiful beaches, visit the incredible S.E.A. Aquarium (home to over 1,000 marine species), or get your heart racing at Mega Adventure Park and the Skyline Luge Sentosa. You could easily spend days here and still not see everything.
-
Address: Sentosa Island
-
Website: Sentosa Island
10. Singapore Botanic Gardens
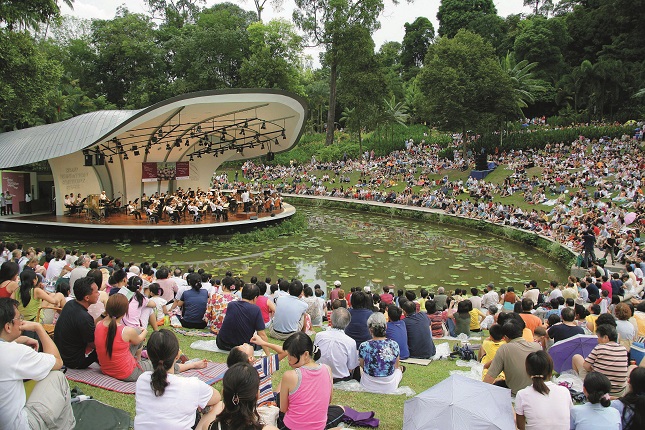
Escape the city buzz and step into a lush, tropical paradise at the Singapore Botanic Gardens, the country’s first UNESCO World Heritage Site. Founded in 1859, this stunning garden is a testament to Singapore’s legacy as a green city. It’s a wonderful place for a peaceful stroll among towering trees and beautifully landscaped flora.
The highlight is the National Orchid Garden, which houses the world’s largest collection of orchids—over 1,000 species are on display in a breathtaking explosion of color. Other themed gardens, like the Ginger Garden and the Rain Forest, offer unique horticultural experiences. It’s a true sanctuary for nature lovers.
-
Address: 1 Cluny Rd, Singapore 259569
-
Hours: 5:00 AM – 12:00 AM
-
Website: The Singapore Botanic Gardens